Scheduling Information in CareTracker is accessed from the CareTracker Main Menu. This is where the kiosk schedule lights are added or maintained.
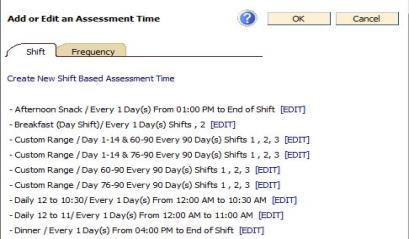
From the CareTracker Main Menu, click Change Scheduling Information. The Change Scheduling Information window will appear. This window displays existing assessment groups and has a link to create a new assessment group.
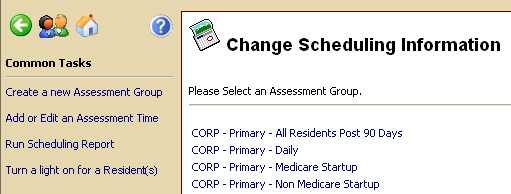
Assessment Groups are applied to turn on lights for groups of residents who have common assessment times. Four typical Assessment Groups are already included with CareTracker. These assessment groups can be edited or deleted as appropriate for your facility. Also, new assessment groups can be added.
- Medicare Startup - Applies to residents who are new to the facility, usually less than 90 days. Their payor source (Medicare) demands that documentation be completed more frequently.
- Non-Medicare Startup - Applies to residents who are new to the facility, usually less than 90 days. Residents whose payor source is something other than Medicare are grouped with the Non Medicare Startup assessment group.
- All Residents Post 90 Days - Residents who have been at the facility longer than their startup period will be categorized with the All Resident Post 90 Days assessment group. After a resident's startup period, go to Resident Information and change the Assessment Group to All Residents Post 90 Days.
- Daily - The daily assessment group will apply to any resident who needs to have documentation completed every day. For example, this would include residents with a significant change. If a significant change is noted with the resident, go to Resident Information and change the Assessment Group to Daily.
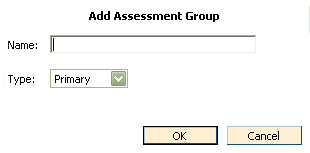
To Add a New Assessment Group
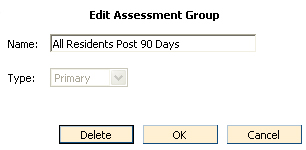
Edit an Assessment Group
To edit an assessment group title, from the Change Scheduling Information window, under Please Select an Assessment Group, select the existing assessment group by clicking the assessment group name. The following window will appear. Edit the assessment group name and click Ok.
To Select the Assessment Time(s) to be Included in the New Assessment Group
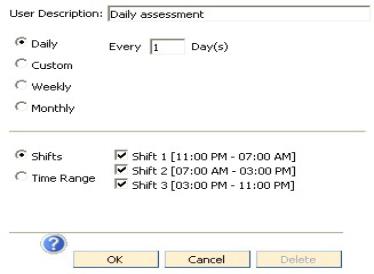
In the CTSchWizard window (example below), click the check box(es) beside each assessment time want to assign to the new Assessment group, or click Create a New Assessment Time to add a new assessment time. In the example below, we have chosen Everyday all shifts.
Add Series to an Assessment Time
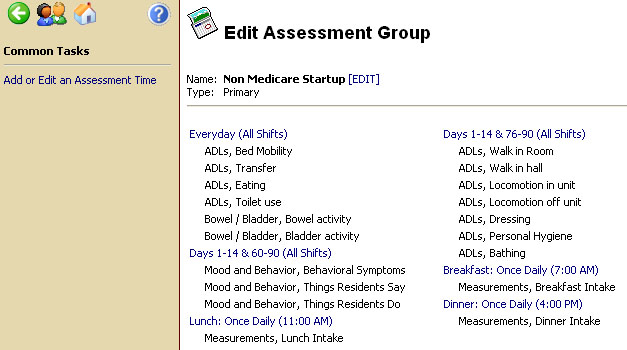
To add series to be included in an assessment time, click the assessment time on the Edit Assessment Group window. In this example the assessment time is titled Everyday all shifts. See illustration below.
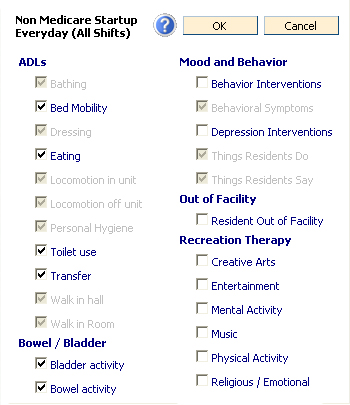
A window similar to the following will appear. The window displays all visible series in the kiosk view. Click the check box beside each series to include with the assessment time. Click Ok to save and exit or Cancel to return to previous screen without saving changes.

To Change Series Included with an Assessment Group
From the Edit Assessment Group window, choose the desired assessment group by clicking on the Assessment Group name. The following window will appear that shows all series included in the current assessment group. Click to mark the check boxes beside each series you wish to light up during the assessment time. To un-mark a check box, click it.
Notes
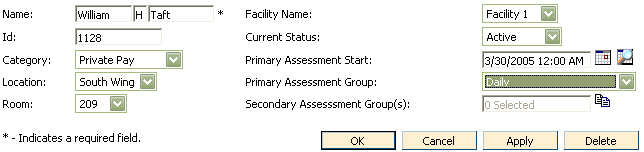
To Assign an Assessment Group to a Resident
Note: only one Primary Assessment Group can be assigned to a resident, however, multiple Secondary Assessment Groups along with a Primary Assessment Group may be assigned.